Shop This Post
- Adventure Medical Kits Trail Dog First Aid Kit — Search on Amazon
- Ruffwear Swamp Cooler Dog Vest — Search on Amazon
- K9 Chill Dog Cooling Collar — Search on Amazon
- Tick Twister Tick Remover Set — Search on Amazon
- Ruffwear Grip Trex Dog Boots — Search on Amazon
- Baskerville Ultra Dog Muzzle — Search on Amazon
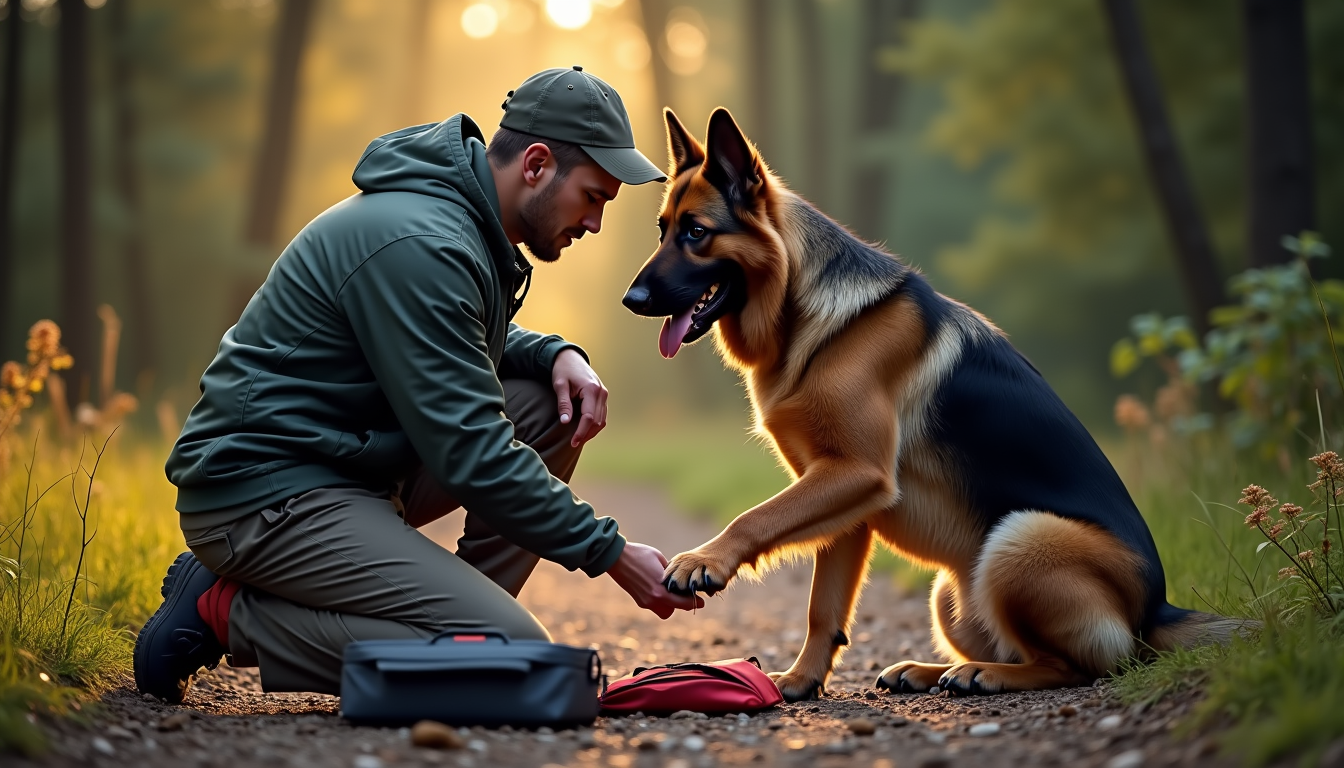
You’re Three Miles In. Your Dog Just Yelped.
It happens fast. One second your dog is bounding through brush, tongue out, living their best trail life. The next they’re holding up a paw, or staggering, or you spot blood on a rock. Trail injuries with dogs don’t come with a warning — and they definitely don’t come with good cell service.
I’ve carried my 55-pound mutt two miles back to the trailhead after he sliced his pad on broken glass. I’ve sprinted a dog with heat exhaustion to the nearest creek. And I’ve pulled more ticks than I care to count off dogs who thought the tall grass was just a really fun jungle gym.
This guide covers the five most common trail injuries you’ll encounter — paw cuts, heat stroke, tick bites, snake encounters, and limping — what to do in the moment, what gear to carry, and how to make the call between “walk it off” and “get to a vet now.”

The Five Trail Injuries You’ll Actually See
1. Paw Pad Cuts and Abrasions
This is the big one. Paw pads are basically shoes built into your dog’s feet, and the trail is full of things that cut through them: broken glass, sharp rocks, thorns, discarded fishing hooks, and that one piece of rusty metal someone left at the campsite.
Signs: Limping, licking the paw excessively, blood trails on the trail, visible cuts or flaps of pad material.
What to do in the field:
- Stop immediately. Don’t let your dog walk on it more than necessary.
- Rinse the wound with clean water or saline to flush out debris.
- Apply gentle pressure with gauze to control bleeding — most pad cuts stop bleeding within 5-10 minutes.
- If you have wound adhesive (super glue works in a pinch for small cuts — yes, really), close small lacerations. For larger cuts or flap injuries, bandage and evacuate.
- Bandage the paw with gauze, then wrap with vet wrap or tape. Not too tight — you should be able to slip a finger under the wrap.
- If the cut is deep enough to see the pink tissue underneath, or if bleeding doesn’t stop after 15 minutes of direct pressure, head to a vet.
Prevention: Dog boots are the single best defense against paw injuries. The Ruffwear Grip Trex boots have a Vibram sole that handles rough terrain, and they stay on better than anything else I’ve tried. Not every dog tolerates boots, but even carrying a pair in your pack for emergencies is smart.

2. Heat Stroke and Overheating
Heat stroke kills dogs on trails every summer, and it doesn’t need to be 100 degrees to happen. Dogs can’t sweat like we do — they dissipate heat primarily through panting, and on hot, humid days with no breeze, that system gets overwhelmed fast. Brachycephalic breeds (pugs, bulldogs, boxers) are especially vulnerable, but any dog can overheat on the right (wrong) day.
Signs: Excessive panting that doesn’t improve with rest, bright red or purple tongue, thick saliva, stumbling, vomiting, diarrhea, glassy eyes, collapse.
What to do in the field:
- This is an emergency. Start cooling immediately.
- Get to shade. Soak your dog with cool (not ice-cold) water — focus on the belly, armpits, and groin where blood vessels are close to the surface.
- If you have a cooling vest or collar, soak it and put it on them. The Ruffwear Swamp Cooler vest works by evaporative cooling — soak it in a stream and it drops your dog’s surface temp significantly. The K9 Chill collar is a lighter option that targets the neck where major blood vessels run.
- Offer small amounts of cool water — don’t force it.
- Do NOT use ice water. It causes surface vessels to constrict, which traps heat internally.
- If your dog’s temperature exceeds 104°F and doesn’t come down within 10-15 minutes, or if they collapse, this is a life-threatening emergency — get to a vet immediately.
Prevention: Hike early or late, carry more water than you think you need, take shade breaks, and know your dog’s limits. A cooling vest isn’t just for comfort — it’s safety gear. See our full breakdown in our trail running gear guide.

3. Tick Bites and Embedded Ticks
If you hike in the eastern US, the upper Midwest, or really anywhere with tall grass and deer, ticks are a fact of trail life. Lyme disease, anaplasmosis, ehrlichiosis — the tick-borne disease list is long and getting longer. The good news: a tick generally needs to be attached for 24-48 hours to transmit Lyme. The bad news: you might not find them until they’ve been feasting for a while.
Signs: Visible tick on the body (check ears, armpits, between toes, around the eyes, and the groin), unexplained limping, lethargy, fever, loss of appetite days after a hike.
What to do in the field:
- Remove the tick immediately. Don’t wait until you get home.
- Use a dedicated tick removal tool — the Tick Twister is cheap, weighs almost nothing, and removes the whole tick including the head. Tweezers work but risk squeezing the tick’s body and regurgitating contents into the bite.
- Slide the Tick Twister under the tick’s body, twist gently, and lift. The tick comes out intact.
- Clean the bite area with antiseptic.
- Save the tick in a ziplock bag with the date and location — if your dog gets sick later, the vet may want to identify the species.
- Watch for signs of Lyme (lameness, fever, lethargy) for the next 2-4 weeks.
Prevention: Pre-treat your dog with a vet-approved flea and tick preventative. Do a full-body tick check after every hike — run your hands through their coat systematically. Focus on the warm, hidden spots ticks love.

4. Snake Encounters and Bites
Rattlesnakes, copperheads, cottonmouths, coral snakes — depending on where you hike, venomous snakes are a real and present danger. Dogs are far more likely to be bitten than humans because they’re closer to the ground, they investigate with their noses, and they don’t have the good sense to leave a buzzing sound alone.
Signs of a bite: Sudden yelp, rapid swelling at the bite site (can be dramatic — a leg may double in size within minutes), puncture wounds (one or two fang marks), pain, difficulty breathing, collapse.
What to do in the field:
- Stay calm. Do NOT try to catch or kill the snake.
- Keep your dog as still as possible — movement increases venom circulation.
- Carry your dog if you can. Walking increases heart rate and venom spread.
- Do NOT cut the wound, apply a tourniquet, suck out venom, or ice the bite. All of these are outdated and harmful.
- Do NOT give your dog Benadryl unless a vet instructs you to — it does nothing for snake venom.
- Note the time of the bite and what the snake looked like (photo from a safe distance if possible).
- Get to an emergency vet immediately. Antivenom is time-sensitive — the sooner you get there, the better the outcome.
Prevention: Keep your dog on leash in snake country. Stay on the trail. Consider protective boots which offer some defense against strikes to the feet. Snake avoidance training is available in many areas and worth every penny if you hike in rattlesnake territory.
5. Limping and Lameness
Not every limp is an emergency — but it’s not always obvious which ones are and which aren’t. Limping can be caused by something as minor as a pebble between the toes, or as serious as a torn CCL (the dog equivalent of an ACL tear).
What to do in the field:
- Stop and inspect. Check the paw first — remove any thorns, burrs, or pebbles between the pads.
- Run your hands along the leg, feeling for swelling, heat, or pain reactions. Check joints for stability.
- If it’s a minor issue (thorn, pebble, mild strain), rest for 10-15 minutes and reassess. If the limp resolves, you can continue at a slower pace.
- If your dog is toe-touching (barely putting weight on the leg) or non-weight-bearing, that’s a significant injury — head back.
- If you suspect a CCL tear (rear leg, sudden onset, common in active dogs), do not let your dog walk on it. Carry or evacuate. Walking on a torn CCL makes the surgery and recovery significantly worse.
- For front leg limping, check for shoulder or elbow issues — these can worsen quickly on uneven terrain.
Carry your dog out: This is where having a good harness with a handle matters. Many trail harnesses have a reinforced top handle that lets you assist your dog over obstacles or carry smaller dogs like a suitcase. For bigger dogs, consider a emergency sling — you can improvise one from a trekking pole and a jacket.

When to Turn Back: The Decision Framework
This is the hard part. Nobody wants to cut a hike short, but your dog can’t tell you how bad it hurts, and they’ll often try to keep going because they want to be with you. Here’s my framework:
Turn back immediately if:
- Your dog is non-weight-bearing on any leg
- You suspect a snake bite (any snake bite)
- Rectal temperature is above 104°F and not coming down
- Your dog collapses, seems disoriented, or is unresponsive to commands
- There’s uncontrolled bleeding after 15 minutes of direct pressure
- Your dog is having trouble breathing
- You suspect a spinal injury (dragging limbs, obvious trauma from a fall)
Consider turning back if:
- Toe-touching lameness that doesn’t improve after 15 minutes of rest
- Multiple paw cuts (one you can manage; several means your dog’s feet are done)
- Vomiting or diarrhea on the trail (early heat sign or GI issue)
- Your dog is suddenly reluctant to move — dogs mask pain, so visible reluctance is significant
- You’re more than 30 minutes from the trailhead and conditions are deteriorating
It’s probably okay to continue (with caution) if:
- Minor thorn or pebble removed and your dog walks normally after
- Small superficial scrape on a pad, not deep, not bleeding much
- Tick removed successfully and your dog is otherwise fine
- Mild fatigue in cool weather with access to water and shade
The golden rule: when in doubt, turn around. The trail will be there next weekend. Your dog’s health might not be.

Trail First Aid Kit Checklist
Your home first aid kit isn’t going to cut it on the trail. Here’s what you need to carry specifically for your dog. I keep this in a waterproof bag inside my pack, separate from the human first aid kit.
Essentials (always carry):
- Tick removal tool — Tick Twister (lightweight, effective, cheap)
- Gauze pads (3×3 and 4×4)
- Vet wrap / self-adhesive bandage
- Antiseptic wipes or spray (chlorhexidine-based)
- Blunt-tip bandage scissors
- Tweezers (for thorns, splinters)
- Nail clippers (broken nails are surprisingly common on trails)
- Saline rinse (small bottle or ampoules)
- Disposable gloves
- Emergency blanket (can double as a stretcher for small dogs)
Strongly recommended:
- Vet-approved wound adhesive (Vetbond or medical super glue)
- Digital rectal thermometer (normal dog temp is 101-102.5°F)
- Muzzle — Baskerville Ultra muzzle (even the sweetest dog can bite when in severe pain)
- Cooling collar or bandana (pre-soak before a hot hike)
- Backup leash (paracord works)
- Diphenhydramine 25mg tablets (for mild allergic reactions — dose with your vet’s guidance, NOT for snake bites)
- Hydrogen peroxide 3% (to induce vomiting if your dog eats something toxic — only with vet guidance)
- Styptic powder (for nail quicks and minor bleeding)
Nice to have:
- Full pre-made trail dog first aid kit — the Adventure Medical Kits Trail Dog First Aid Kit is a solid starting point that covers most of the essentials above
- Dog boots — Ruffwear Grip Trex for both prevention and emergency paw protection
- Cooling vest — Ruffwear Swamp Cooler for hot-weather hikes
- LED collar light (for low-light evacuations)
- Slip lead (combines collar and leash in one)
Check out our full dog first aid kit essentials guide for a deeper dive into building your kit from scratch.

Tech That Can Save Your Dog’s Life
Two apps deserve a permanent spot on your phone before you hit the trail:
Red Cross Pet First Aid App — Free on iOS and Android. Step-by-step instructions for dozens of emergencies, with videos. Works offline. If your dog gets hurt and you can’t remember the right protocol, this app walks you through it in real time. It’s the closest thing to having a vet in your pocket.
Vetster — Connects you with licensed vets for video consultations. If your dog has a minor issue on the trail and you’re trying to decide whether it’s worth evacuating, a 15-minute video call with a vet can give you clarity. Obviously this requires cell service, but it’s worth downloading before you lose signal — it’s free to have on your phone and could save you a frantic drive to an unfamiliar emergency clinic.
Both are free downloads. There’s zero reason not to have them before your next hike.
A Few Things I Learned the Hard Way
After years of hiking with dogs and dealing with more trail injuries than I’d like to admit, here’s what I wish someone had told me sooner:
- Cut your hike short at the first sign of trouble. Every time I’ve pushed through, I’ve regretted it. Every time I’ve turned around, I’ve been glad I did — even when it turned out to be nothing major.
- Carry more water than you think you need. Split it between you and your dog, then add another bottle. Dehydration makes every other injury worse.
- Pre-hike your dog’s feet. Check for cracks or wear on the pads before you leave. Soft city-dog pads get shredded on rocky trails. Boots aren’t a luxury — they’re preventative care.
- Know the nearest emergency vet before you go. Look it up at the trailhead. You don’t want to be searching while your dog is bleeding.
- Train your dog to accept handling. If your dog won’t let you touch their paws, look in their ears, or open their mouth at home, they definitely won’t let you on the trail when they’re hurt and scared. A Baskerville muzzle in your kit is a safety net — but better to never need it.
- Keep your car emergency kit stocked. The trail is one thing, but the drive home matters too. Having supplies in your vehicle means you’re never starting from zero.
The Bottom Line
Trail injuries with your dog aren’t a matter of if — they’re a matter of when. The difference between a scary moment and a real emergency comes down to three things: having the right gear, knowing what to do, and being willing to turn around.
Build your trail first aid kit. Download the apps. Practice at home so you’re not fumbling on the trail. And when in doubt — always, always — turn back. Your dog will forgive you for a ruined hike. They won’t forgive you for a ruined knee.
For more trail safety and gear coverage, check out our guides on trail running gear for dogs, camping gear that’s actually worth the money, and the best dog harnesses for hiking.